1 Data Input

1.1 VCF
Required File:
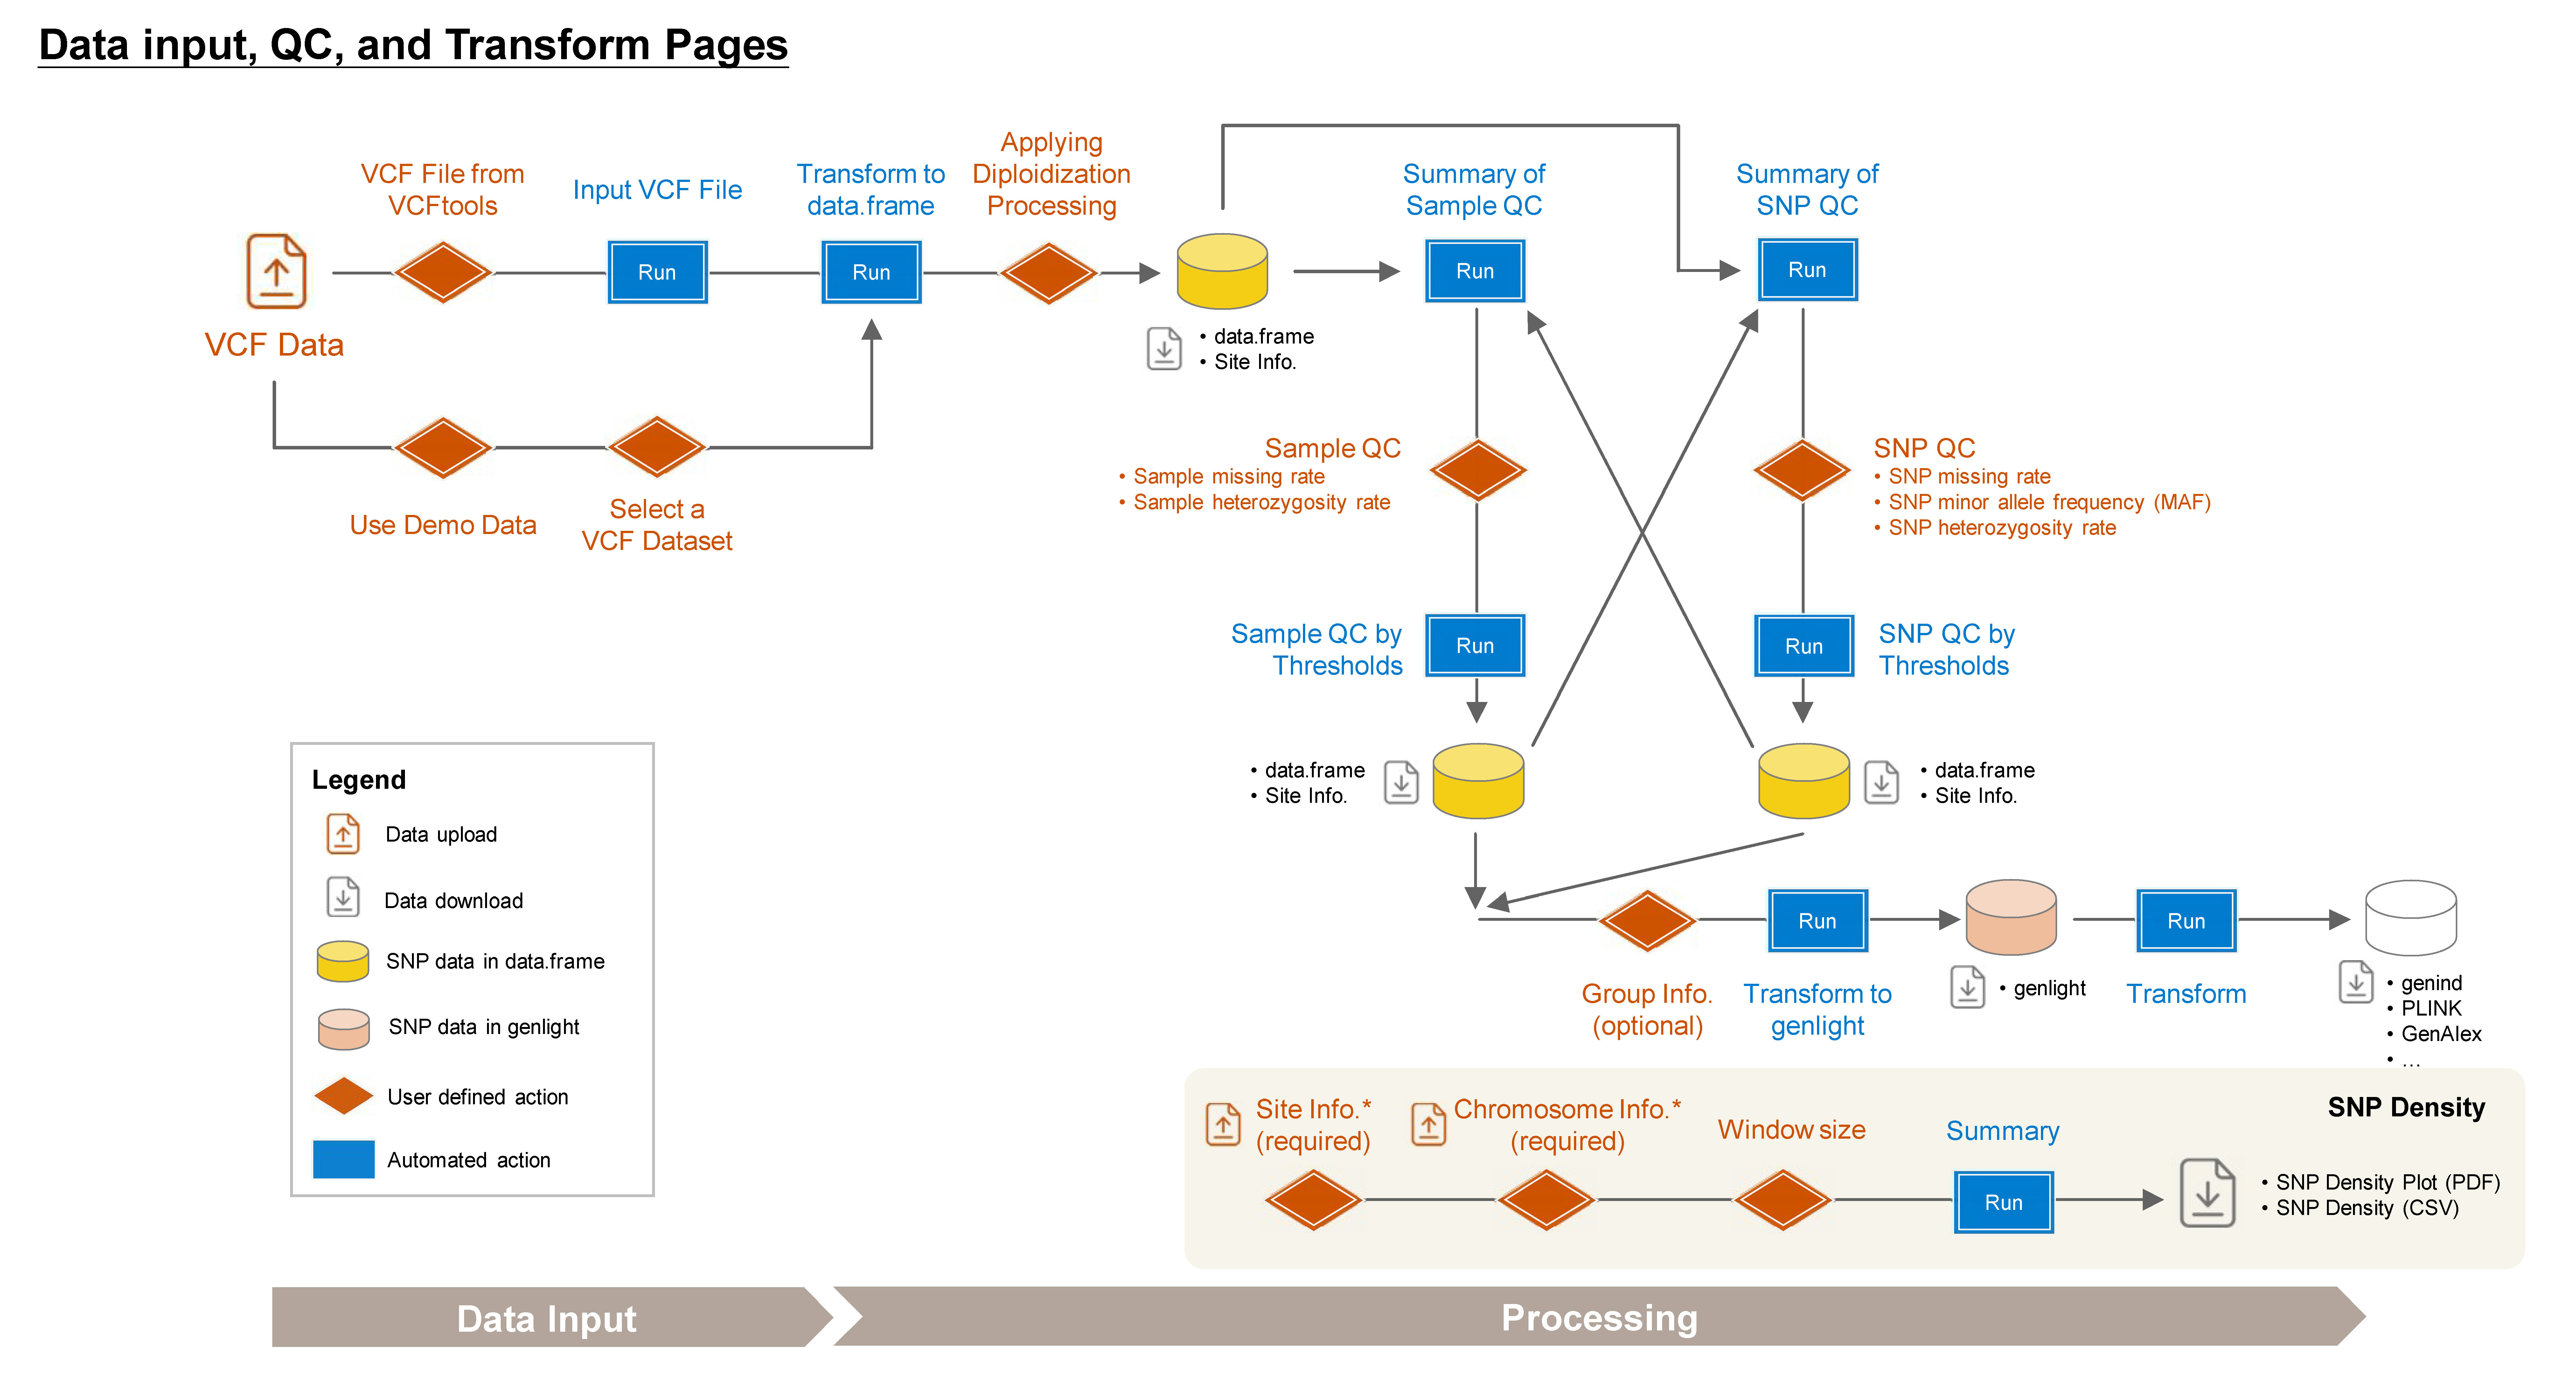
ShiNyP accepts VCF files in the following formats:
- VCF file from PLINK
- VCF or gzipped VCF (vcf.gz) file from VCFtools
- VCF file in RDS format previously saved by ShiNyP
Note: The VCF file should contain SNPs’ chromosome and position information in the first two columns (
#CHROMandPOS), along with sample names and their genotypic information. For some whole genome sequencing (WGS) data, where SNP markers’ IDs are missing, ShiNyP will auto-generate the SNP ID names as #CHROM:POS, such as 2:12500, indicating chromosome 2, position 12500.
Step 1: Upload VCF File
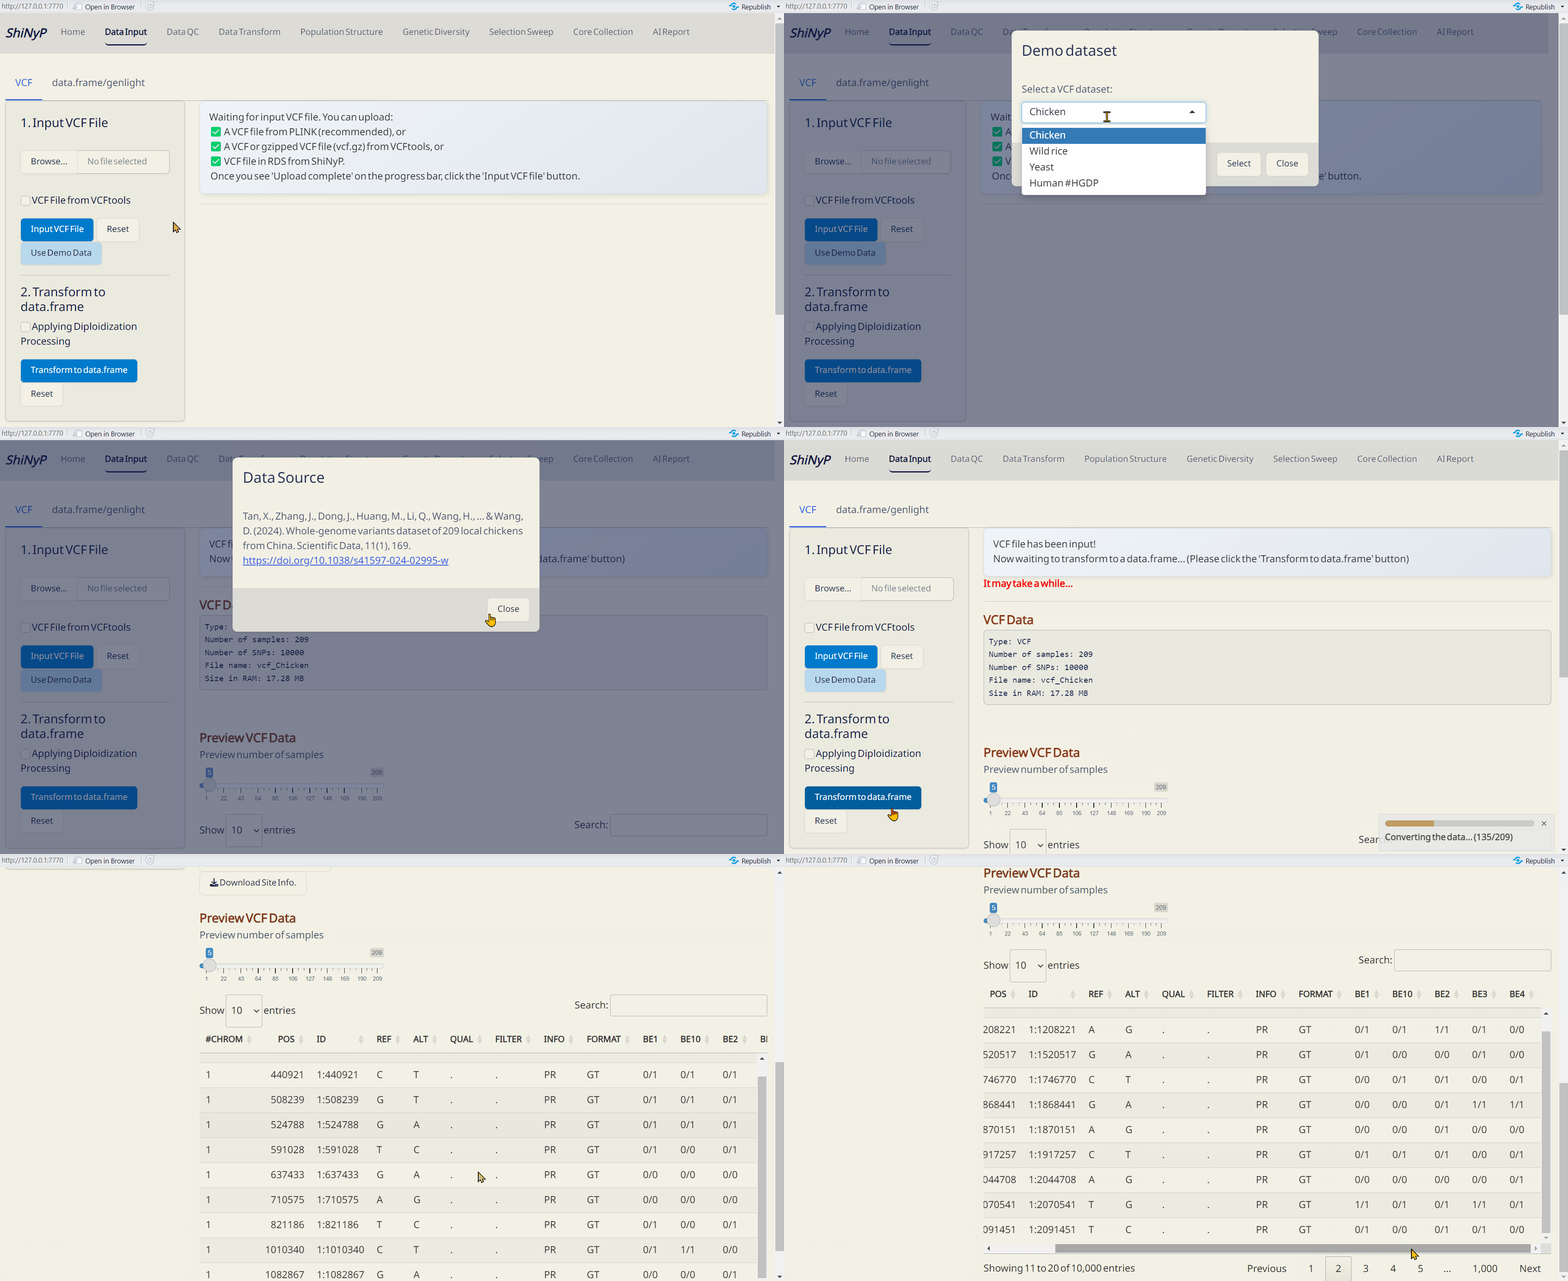
- Click Browse to select and upload your VCF file.
- If your file was generated using VCFtools, make sure to check the “VCF file from VCFtools” option.
- After the progress bar shows ‘Upload complete’, click Input VCF File to proceed.
Or Use Demo Data
- Click Use Demo Data and choose a species from the list.
- For details about the demo datasets, visit: https://github.com/TeddYenn/ShiNyP/tree/main/inst/demo_data.
Note: By default, the interactive table will display genotype data for 5 samples and 10 SNPs as a preview.
Step 2: Transform to data.frame
- After uploading your VCF file, click Transform to data.frame.
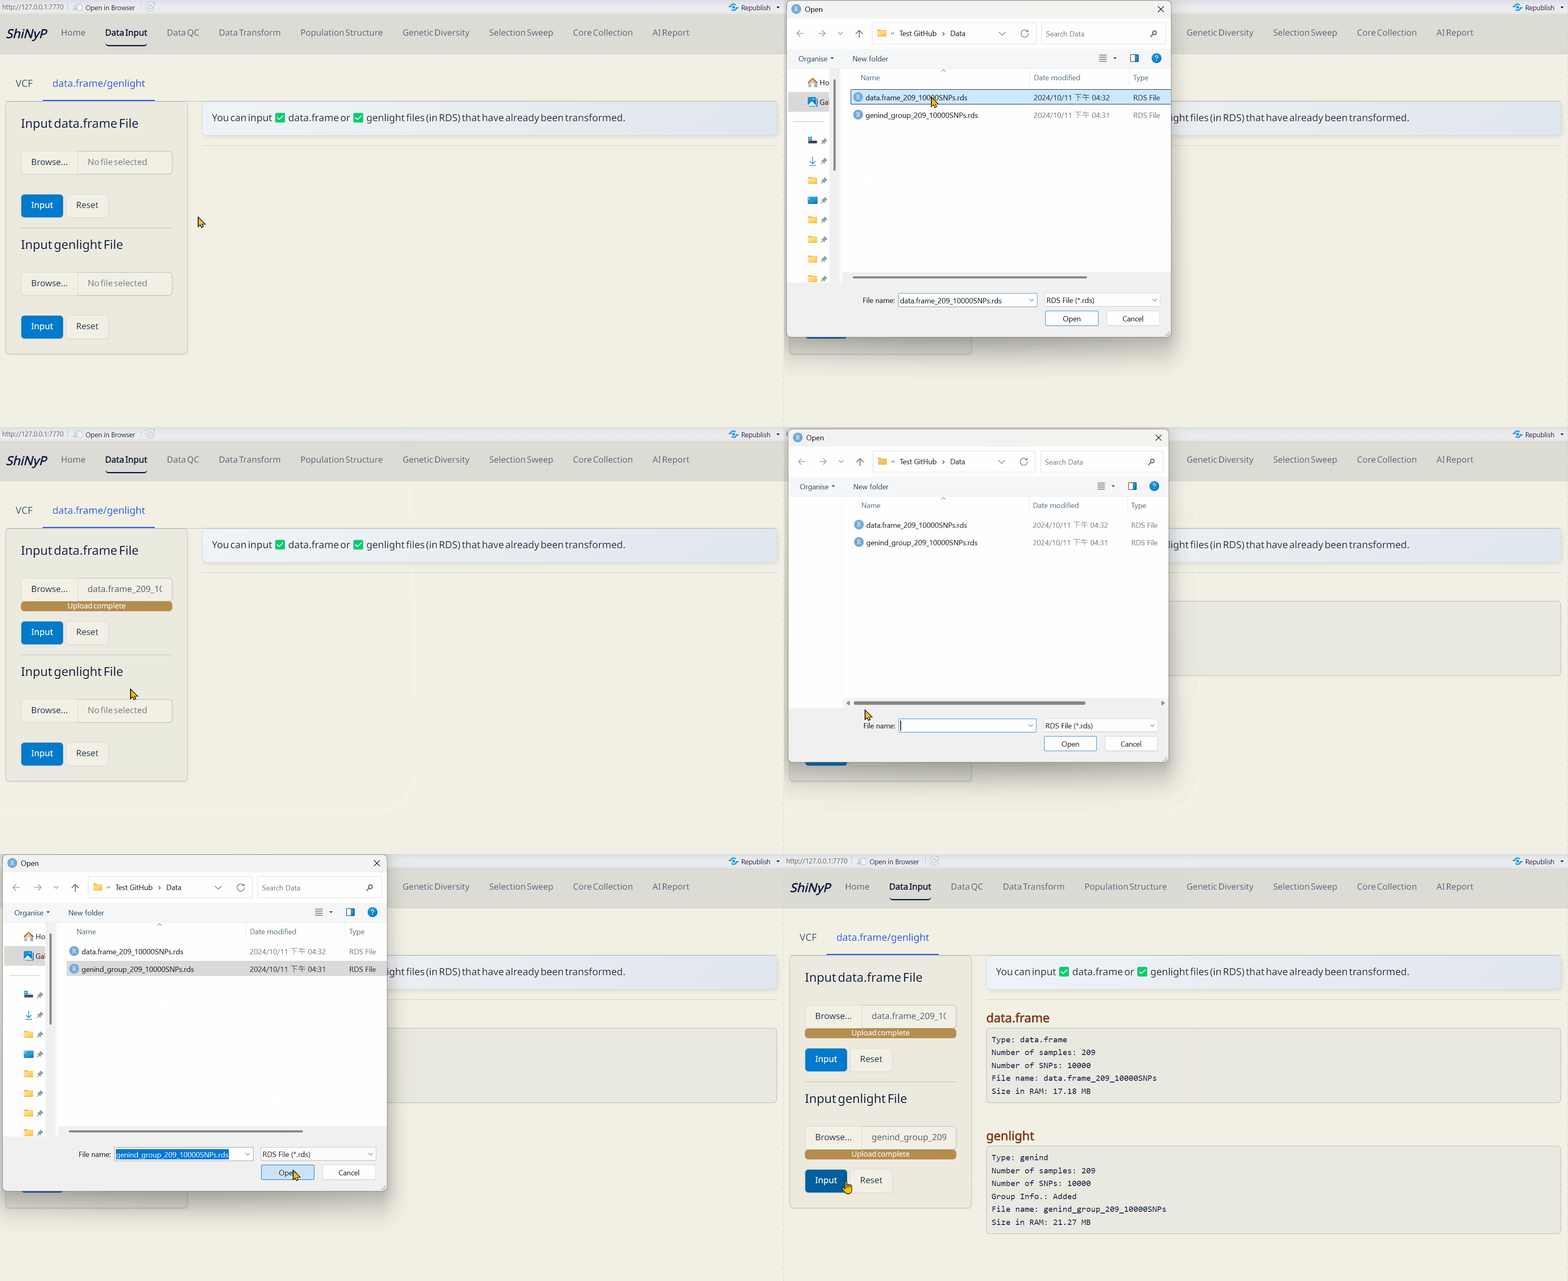
- Download the generated data.frame and Site Info (both in RDS format) to skip VCF upload next time by directly importing these files.
Note: ShiNyP is optimized for genome-wide SNP analysis in diploid species. For haploid or polyploid data, please the check “Applying diploidization processing” option. This approach simplifies genotype data and does not account for allelic dosage effects.
Outputs:
- VCF Data (RDS): Raw VCF data in RDS format, readable in R.
- data.frame (RDS): Contains genotypic data — required for downstream analysis.
- Site Info. (RDS): Contains SNP site information — required for downstream analysis.
Note: For large datasets (>1GB), processing may take time. ShiNyP handles one task at a time — please wait for each step to complete before proceeding.

